Should I use a Block and Tackle or a Differential Pulley?

 
We’re often asked whether to use a block and tackle or a differential pulley for a particular job. We’re also often asked whether rope will suffice or whether it needs to be chain. Generally the heavier the load, the more likely the better tool for the job is a differential pulley using chain.
Definitions:
Block and Tackle: A system of 2 or more pulleys with a rope or cable threaded between them, usually used to lift or pull loads. The pulleys are assembled together to form blocks and then blocks are paired so that one is fixed and one moves with the load.
Differential Pulleys: Also called “Weston differential pulley,” or “chain hoist”. A pulley used to manually lift very heavy objects like car engines. It is operated by pulling up on the slack section of a continuous chain that wraps around pulleys. The relative size of 2 connected pulleys determines the maximum weight that can be lifted by hand.
Example Block and Tackle and Differential Pulley Jobs. Click
here: https://www.ronstanindustrial.com/should-i-use-a-block-and-tackle-or-a-differential-pulley/
The less friction in the equipment the more efficiently the block and tackle and differential pulley will work. For block and tackles we recommend Toulon roller balls and Toulon bushings on polished shafts. For differential pulleys we recommend steel ball bearings, either sealed or greased.


News and Updated

Website: https://www.ronstanindustrial.com/
Blog: http://ronstanindustrial.blog.com/
WordPress: https://wordpress.com/stats/insights/ronstanindustrialblog.wordpress.com
Blogspot: http://ronstanindustrial.blogspot.com/
Google Plus: https://plus.google.com/u/0/+Ronstanindustrial_hardware
Twitter: https://twitter.com/RonstanHardware
Pinterest: https://www.pinterest.com/ronstanlnc/
Slideshare: http://www.slideshare.net/ronstanindustrial
Facebook: https://www.facebook.com/RonstanIndustrial


Selecting the Right Shackle

Selecting the right type of shackle for the job can be a real challenge, one we and our experts here at Ronstan understand all too well. In this article, we will look at the advantages of a Snap Shackle over a D-Shackle, and talk you through the key differences to enable you to make a fully informed choice.

RF6397-260x260
D-Shackle

The D-Shackle gets its name, unsurprisingly from its D-shaped design which makes it easier to identify somewhat helpfully. The main thing about the D-Shackle is that it is narrower than other types of Shackle such as the Anchor, and it also more often than not has a threaded pin closing mechanism. Its main function due to its smaller nature therefore, is to take high loads on the primary line. If used on a side, or raising line for loads, it may buckle. As with other Shackles, a D-Shackle tends to come in a galvanised metal or stainless steel, and with a variety of pin options to suit your needs.

RF64111-260x260
Snap Shackle

Next up – Snap Shackles. Now this type of shackle is designed with a spring activating mechanism, thus giving it the snap name. The main advantage of this type of shackle is that it can be used swiftly with one hand. So, if speed is the aim of the game, then the Snap Shackle is the shackle for you. It is also the one for jobs where you need to disconnect, reconnect, and repeat manoeuvres. Because of this nature, it means they are however not so great for heavy duty work as they have lower working load limits compared to their family members. Within the snap genre, there is the swivel eye, the swivel jaw, the fixed snap and the rope snap. As the Snap Shackle comes in several different compositions it is more flexible, one of the main drawbacks of the D-Shackle is the fact it doesn’t move or flow, the Snap Shackle with the swivel element means you can do a lot more with it.

So take into considering the pros and cons of the D-Shackle versus the Snap Shackle when making your selection, and don’t forget to look into the type of pin that will work best for your operation too. If in doubt, give the team at Ronstan a call!

News & Update

Website : https://www.ronstanindustrial.com/
Blog : http://ronstanindustrial.blog.com/
WordPress : https://wordpress.com/stats/insights/ronstanindustrialblog.wordpress.com
Livejournal http://ronstanindustrial.blogspot.com/
Blogspot : http://ronstanindustrial.blogspot.com/
Twitter : https://twitter.com/RonstanHardware
Pinterest : https://www.pinterest.com/ronstanlnc/
Google Plus : https://plus.google.com/u/0/b/104506917868240931009/+Ronstanindustrial_hardware/
Facebook : https://www.facebook.com/RonstanIndustrial


Circus Tent Erection – Blocks, Pulleys and More

Here at Ronstan we know our blocks and pulleys are used for a large number of exciting tasks – such as erecting a circus tent!

Ronstan we know our blocks and pulleys are used for a large number of exciting tasks – such as erecting a circus tent!

Key Elements of a Circus Tent
Firstly, becoming familiar with all the elements which make up the tent is key. Knowing how they work, which part does what, and most importantly; what goes where! Secondly, it is all about the tools. You will need these key items to erect your circus tent:

  • Tent Canvas (for the roof)20
  • The Central Pole
  • The Secondary and Tertiary Poles
  • Individual Pole Bale-Ring and Flag Staffs
  • Some Strong Stakes
  • A Sledgehammer
  • A Series of Strong Blocks and Pulleys
  • At Least 500 Feet of Strong Quality Rope

Step 1 – Assess the area15
The starting point is properly assessing the area in which you wish to erect your circus tent. The required size of the area is very much dependent on the size of your tent (typical oval circus tents are usually around 118 feet by 150 feet but they can be as large as 500 feet). So be sure to know what you are working with to start.

2–Mark out the area16 The next step is then marking out the area to match the diameters

of our specific tent. Be sure to do this with caution, as measuring accurately is of pivotal importance when erecting such a structure. The next marking is also important. You should work out the exact center of the space, as this is where you will place your central pole.

Step 3 – Time to stake out19 Next comes the fun part – driving the stakes into the ground. Using your sledgehammer, drive each stake into the ground until only a third of it is showing, this will ensure that these grounding are secure. Now the stakes should be quite a size, up to five feet long and three inches thick.

Step 4 – Roll out the canvas!

11

Now it is time to unfold the canvas. Roll it out within the confines  of your market out area so that it is central. Then prepare the internal poles by placing spacing them out equally between the stakes, at this point again refer to your tents instructions for specific dimensions for your individual tent. Create a small hole for the central pole to be placed in. Then prepare your Ronstan block and tackle units, and the flag staff by attaching the block and tackle to each pole, and connect the strong ropes for the raising and positioning of the central pole. Assemble the crew and use the pulley system to erect the central pole, with one member at the base of the pole armed with a crowbar for positioning, and a small group to physically aide the pole in its erection.

Step 5 – Fasten the canvas5
Then it comes to fastening the canvas roof in place. Each portion needs to be secured to the bale ring which encircles the centre pole by rope. Next prepare the bale ring of each pole for raising, by once again utilizing the pulleys. Then when you pull on the ropes the tent will lift to the ceiling, then you must close the seams at the bale ring of each pole and tie off the ropes.

Step 6 – Erect the minor poles
Finally, you can erect the minor poles throughout the circumference of the tent. Mount each upon a stake and then lift with the same rope and pulley procedure used for the main poles. The canvas will now be airborne, perfectly supported by each of the poles. Fasten the tent top to each stake and secure all ropes and flaps. Now you are ready to perform a final safety check before working on your stage and lighting rigging.

Ronstan Industrial provide the equipment people can rely on.


News & Update

Website : https://www.ronstanindustrial.com/
Blog : http://ronstanindustrial.blog.com/
WordPress : https://wordpress.com/stats/insights/ronstanindustrialblog.wordpress.com
Livejournal http://ronstanindustrial.blogspot.com/
Blogspot : http://ronstanindustrial.blogspot.com/
Twitter : https://twitter.com/RonstanHardware
Pinterest : https://www.pinterest.com/ronstanlnc/
Google Plus : https://plus.google.com/u/0/b/104506917868240931009/+Ronstanindustrial_hardware/
Facebook : https://www.facebook.com/RonstanIndustrial


The Beauty of Stainless Steel Cable Railings

Sleek, modern and clean; stainless cable railings are growing in popularity in many different locations.

Beauty of Stainless Steel Cable Railings

Advantages of Stainless Cable for Railing Systems:

  1. Aesthetic feel. By using stainless cable instead of wood or cement for railings and balustrades, the entire aesthetic feel is transformed. There is a certain sense of stylishness that’s undeniable, and its elegance is assured due to the clean and sleek lines. It’s a thoroughly modern look perfect for 21st century buildings and homes.
  2. Free and uninterrupted views. What’s more, views which can be hampered by wood or cement barriers become free and uninterrupted. For outdoor decking, you get much better views, and there’s a certain sense of freedom and space.
  3. Easy to maintain. These stainless cable systems are actually very easy to maintain. After all, they are stainless steel, so they don’t need much maintenance at all. They can be impervious to the elements, and they can stand much wear and tear. They are much harder to damage. Wood and cement barriers and railings, on the other hand need constant maintenance. Their looks are easily marred by dirt and grime, and they need constant upkeep. For cement railings, you’ll have to repaint every so often if you want to maintain a pristine look. Wood railings have the same vulnerabilities.

Read more about an Advantages of Stainless Cable for Railing Systems.

News & Update

Website : https://www.ronstanindustrial.com/
Blog : http://ronstanindustrial.blog.com/
WordPress : https://wordpress.com/stats/insights/ronstanindustrialblog.wordpress.com
Livejournal : http://ronstanindustrial.blogspot.com/
Blogspot : http://ronstanindustrial.blogspot.com/
Twitter : https://twitter.com/RonstanHardware
Pinterest : https://www.pinterest.com/ronstanlnc/
Google Plus : https://plus.google.com/u/0/b/104506917868240931009/+Ronstanindustrial_hardware/
Facebook : https://www.facebook.com/RonstanIndustrial

How Pulleys Changed the World

4
Pulley System

As is the case with all the simple machines, that these days we couldn’t do without, the origin of the pulley system is unknown. It is thought that by 1500 BC, people in Mesopotamia were using rope pulleys for hoisting water.

The first documented use of compound pulleys in a block and tackle system is that of Archimedes, and it’s almost certain they were used in the building of the famous Stonehenge in the UK.

Pulleys work by trading distance for effort and changing the direction of the force. An7 example, in simple language, using two pulleys to lift a weight it only needs half the force to lift it as it would with one pulley, however if the weight was being lifted one metre high, two metres of rope would be needed.  This is termed the ‘mechanical advantage’ and can be increased by adding more pulleys into the block and tackle system.

Pulley Systems

The three types of pulley are:

  • Fixed axle – mechanical advantage of 1
  • Movable axle – mechanical advantage of 2
  • Compound – a combination of fixed and movable pulleys, the mechanical advantage equals the amount of pulleys used.

Pulleys were responsible for the birth of the crane. The first recorded cranes appeared in Greece around the late 6th century BC, now it’s an indispensable piece of machinery that most of us see on an almost daily basis.

News & Update

Website https://www.ronstanindustrial.com/
Blog http://ronstanindustrial.blog.com/
WordPress https://wordpress.com/stats/insights/ronstanindustrialblog.wordpress.com
Livejournal http://www.nanaimoyacht.livejournal.com
Blogspot http://ronstanindustrial.blogspot.com/
Twitter https://twitter.com/RonstanHardware
Pinterest https://www.pinterest.com/ronstanlnc
Google Plus https://plus.google.com/u/0/b/104506917868240931009/+Ronstanindustrial_hardware
Facebook https://www.facebook.com/RonstanIndustrial

When is a pulley not a pulley?

Answer : when there are more than 2 and then they become a block and tackle.

Block and tackle pulley system consists of more than one block with rope, are termed tackle.
A single Pulley


A single pulley is seldom used on its own, generally several of them are used in the commonly known ‘block and tackle’ systems, an individual pulley being a block and, in an assembly of more than one block with rope or cable threaded through, they are termed tackle.

The more pulleys that are used in the block and tackle system, the easier it becomes to lighten the load.

There are, of course, several types of blocks available:

  • Stainless steel blocks which have the great advantage of long life and virtually no maintenance
  • Ball bearing blocks which give low friction and maximize the load bearing performance
  • High capacity blocks used when strength is of paramount importance
  • Block and tackle pulley system consists of more than one block with rope, are termed tackle.
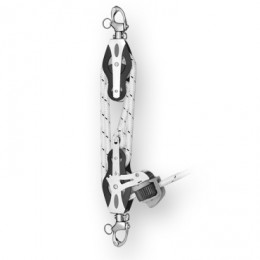
Special purpose blocks, e.g. those that can be permanently mounted within walls
  • Snatch blocks, used to ‘snatch’ some of the load as they can be inserted anywhere along the load-bearing cable/rope without having to remove the load to re-thread the cable/rope
  • Blocks manufactured from different materials for different uses

It would be very difficult to imagine how life would be without the invention of the age-old block and tackle!

News and Updated

Website: https://www.ronstanindustrial.com/
Blog: http://ronstanindustrial.blog.com/
WordPress: https://wordpress.com/stats/insights/ronstanindustrialblog.wordpress.com
Blogspot: http://ronstanindustrial.blogspot.com/
Google Plus: https://plus.google.com/u/0/+Ronstanindustrial_hardware
Twitter: https://twitter.com/RonstanHardware
Pinterest: https://www.pinterest.com/ronstanlnc/
Slideshare: http://www.slideshare.net/ronstanindustrial
Facebook: https://www.facebook.com/RonstanIndustrial


Blocks and Tackles – Pulley Systems for Dummies

Safety Systems for all purpose.
Blocks and Pulleys

Just about everyone has seen a crane working at a building site, but have you noticed its attached mechanisms? (Its block tackle & pulley systems ) If you look carefully you’ll notice there’s a block and tackle, an indispensable piece of equipment which can be seen in numerous places and for numerous uses.

Block & Tackle

A block and tackle is a system where several pulleys, or blocks, are joined together with ropes, belts or chains to raise or move heavy weights, the word ‘pulley’ has become synonymous with the word ‘block’.

Different block and tackle systems are used according to the weight they are required to lift, working out the tackle needed requires some degree of mathematical ability but in simple terms, for those who dislike maths, it’s all to do with what is termed ‘mechanical advantage’.

If we imagine someone drawing water from a well the mechanical advantage is the ratio of the force produced, i.e. the power to lift a full bucket of water, to the force applied to it, i.e. the effort put into the lifting which, without the pulley, would only have been enough for half a bucketful.

For more the various tackles with their mechanical advantages please visit us.

News and Updated

Website: https://www.ronstanindustrial.com/
Blog: http://ronstanindustrial.blog.com/
WordPress: https://wordpress.com/stats/insights/ronstanindustrialblog.wordpress.com
Blogspot: http://ronstanindustrial.blogspot.com/
Google Plus: https://plus.google.com/u/0/+Ronstanindustrial_hardware
Twitter: https://twitter.com/RonstanHardware
Pinterest: https://www.pinterest.com/ronstanlnc/
Slideshare: http://www.slideshare.net/ronstanindustrial
Facebook: https://www.facebook.com/RonstanIndustrial

Pulley Blocks, Wire Blocks, Core Blocks

What is a pulley block?

Blocks are simple devices that consist of a grooved wheel through which a rope or cable can run and change the direction of the force needed to lift a load thus increasing the mechanical advantage.

RZ1704-260x260
Blocks

Blocks are also known as pulleys, the differences between them are blurred in that they are often constructed from similar parts and materials and would seem to have the same purpose. However, although both redirect the force required to lift a load, they are called blocks when constructed with one or more sheaves between each side plate and are capable of handling shock loads, for example should a heavy log fall from a tree being felled, a block would be capable of holding the load until it was brought under control, whereas pulleys, more likely to be running on ball bearings, are used to simply improve mechanical advantage. They are not designed to handle shock loading, they are lighter and smaller than blocks and are usually designed to work with soft ropes rather than cables or wire ropes.

Where blocks are used

Blocks are used wherever there is a need to lift or move a heavy load. The uses are numerous and include lifting gear in the construction industry; vehicle breakdown gear; leisure activities such as mountain chairlifts and hoisting yacht sails; bed hoists for the infirm and disabled; safety lifting gear; mountain or water rescue gear; suspension bridges; industrial safety equipment.

Typical industry sectors


Mainly because of the mechanical advantage feature, i.e. the ratio of the force produced by a device that acts on a load to the applied effort needed to lift or move the load, blocks and tackle are an indispensable piece of equipment and used in almost all sectors of industry – agriculture, commercial, construction, manufacturing, logging, oil drilling and marine.

News and Update

Website https://www.ronstanindustrial.com/
Blog http://ronstanindustrial.blog.com/
WordPress https://wordpress.com/stats/insights/ronstanindustrialblog.wordpress.com
Livejournal http://www.nanaimoyacht.livejournal.com
Blogspot http://ronstanindustrial.blogspot.com/
Twitter https://twitter.com/RonstanHardware
Pinterest https://www.pinterest.com/ronstanlnc/
Google Plus https://plus.google.com/u/0/b/104506917868240931009/+Ronstanindustrial_hardware
Facebook https://www.facebook.com/RonstanIndustrial

How to set up an Outrigger | Ronstan Industrial

Ronstan provide a range of specialist fittings which can be used for some of the key elements of outriggers. A great addition to fisherman’s boat are outriggers as they enable them to increase their total  catch.

An outrigger is usually positioned rigidly to the main hull but as with most boating equipment, there are several types of outriggers and the mounts that they sit on.

How to install your outrigger

Depends on which mounting option you have gone for, but there are a few tips that should be followed when mounting any outrigger. Firstly all mounts should be through bolted, Outriggers are a great addition to any fisherman’s boatpreferably with stainless steel and additional backing plates. Secondly you need to carefully consider placement, to make sure that you have adequate access to the outrigger components as needed. Thirdly, do not use poles that are disproportionately heavy for their intended usage – pick the lightest possible for your boat and desired set up.

When setting up your outrigger you need to ensure that the end where the line attaches is at the right height. If set too high or two low you can run into problems. The ends of the poles should be about four to five meters above sea level for optimum usage. That is, an angle of setting up your outrigger you need to ensure that the end where the line attaches is at the right height.around 30-40 degrees from the horizontal marker. It is important to remember however that the further the lines run, the more the tow angle is reduced. A reduced angle doesn’t help the lure’s action but can be improved by lifting the tow point by running it from the outrigger out to sea.

Make sure you have the right components, and someone to help you, and setting up your outrigger should be pretty simple or if in doubt your local fishing shop or your boat supplier should be able to recommend the most appropriate set up.

Ronstan provide a range of specialist fittings which can be used for some of the key elements of outriggers. This includes our blocks and shackles.

Contact us for more Information: https://www.ronstanindustrial.com/


News and Updated

Website: https://www.ronstanindustrial.com/
Blog: http://ronstanindustrial.blog.com/
WordPress: https://wordpress.com/stats/insights/ronstanindustrialblog.wordpress.com
Blogspot: http://ronstanindustrial.blogspot.com/
Twitter: https://twitter.com/RonstanHardware
Pinterest: https://www.pinterest.com/ronstanlnc/
Slideshare: http://www.slideshare.net/ronstanindustrial
Facebook: https://www.facebook.com/RonstanIndustrial

Balustrade & Railing by Ronstan Industrial

Ronstan offers its wealth of knowledge and expertise in the many applications of cable systems. Our services include; design engineering, project management, and installation

wire-balustrading
balustrades and Railings

Cables give balustrades and railings a sense of elegance, space and style. With careful planning and design, they have the ability to totally transform the look. Their clean and simple lines create a sleek and modern aesthetic, while offering uninterrupted views. They’re contemporary, low-maintenance and surprisingly easy and fast to install.

Ronstan has been setting the standard for cable applications in balustrades and railings since 1988.

Making it easier for you

museo-acero-3-840x1085-792x1024
Balustrade and Railing


Our new balustrade and railing was designed to make life simpler for you. The process of researching and selecting the right system has been streamlined. We have five new complete cable systems, each one with an individual part number. This means no more time-wasting and frustration selecting individual components. All the information you need is logically laid out, with clearly displayed diagrams and details. It’s the definitive resource for balustrade and railing cables.


News and Updated

Website: https://www.ronstanindustrial.com/
Blog: http://ronstanindustrial.blog.com/
WordPress: https://wordpress.com/stats/insights/ronstanindustrialblog.wordpress.com
Livejournal: http://www.nanaimoyacht.livejournal.com/
Blogspot: http://ronstanindustrial.blogspot.com/
Google Plus: https://plus.google.com/u/0/b/104506917868240931009/+Ronstanindustrial_hardware/
Twitter: https://twitter.com/RonstanHardware
Pinterest: https://www.pinterest.com/ronstanlnc/
Slideshare: http://www.slideshare.net/ronstanindustrial
Facebook: https://www.facebook.com/RonstanIndustrial